Designers often use curved text to create modern logos, badges, and circular layouts. While Figma doesn’t include a built-in “curve text” feature yet, there are simple workarounds that let you achieve this effect seamlessly. In this guide, you’ll learn different methods to curve text in Figma — from using plugins to manual techniques.
Let’s dive in to the in-depth guide of How to Curve Text in Figma?
Table of contents
What is Curved Text?
Curved text is a typography effect where the text follows a path or curve, rather than being straight. This effect is commonly used to create dynamic and creative visual designs where the text bends or wraps around shapes, logos, banners, or decorative elements. It adds a more engaging and artistic look to the text, making it stand out in various design projects.
Like This :

Why Use the Curved Text Effect?
Curving text is a popular design technique that can enhance the visual appeal of your project. Here are a few reasons why you might want to use this effect:
1. Creative Design: Curved text allows you to break free from traditional straight lines, giving your design a unique and dynamic appearance.
2. Visual Interest: It grabs attention and adds personality, making your design more eye-catching and memorable.
3. Logo Design: Often used in logo design, where text is curved around shapes like circles, making the logo more cohesive.

4. Brand Identity: Helps in creating distinctive, branded typography that stands out across various platforms.
How Many Methods Are Mainly Used to Create Curved Text?
There are two main methods to create curved text in Figma:
- Text on Path (Built-in Figma Feature): A simple, straightforward method to curve text around predefined shapes like circles, ellipses, or custom paths.
- Using Plugins (Arc Plugin): Plugins offer additional flexibility and control over the curvature, allowing you to quickly create curved text with adjustable radius, angle, and more.
How to Create Curved Text Effect in Figma
Here’s how you can create a curved text effect using both methods:
Method 1: Using the ‘Text on Path’ Tool (Built-in Figma Feature)
1. Create Your Text:
- Select the Text Tool (T) and type your desired text.

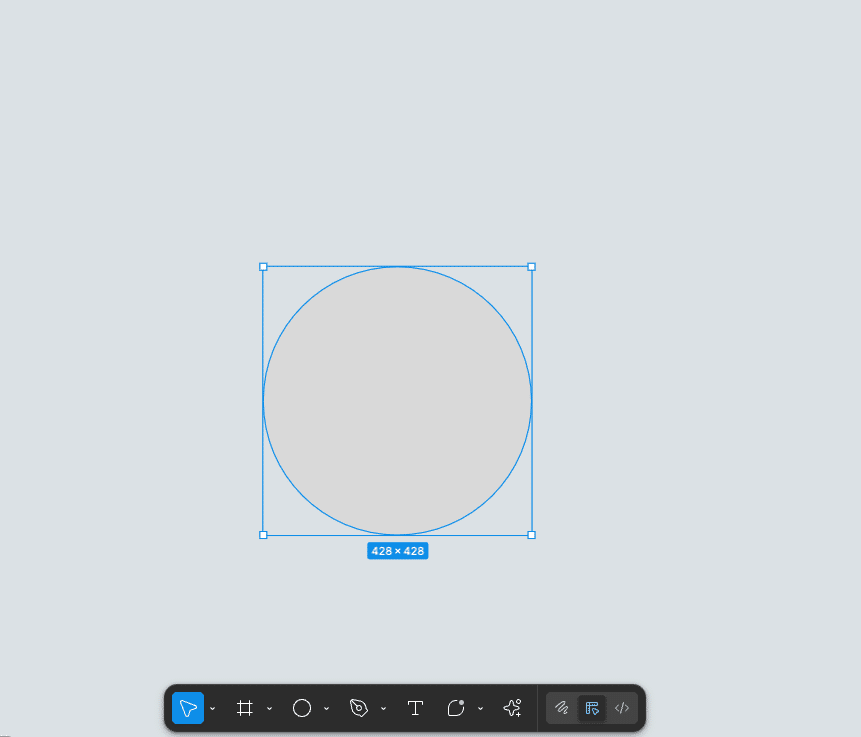
2. Draw a Path:
- Use the Ellipse Tool (O) for a circular path or the Pen Tool (P) for custom paths.
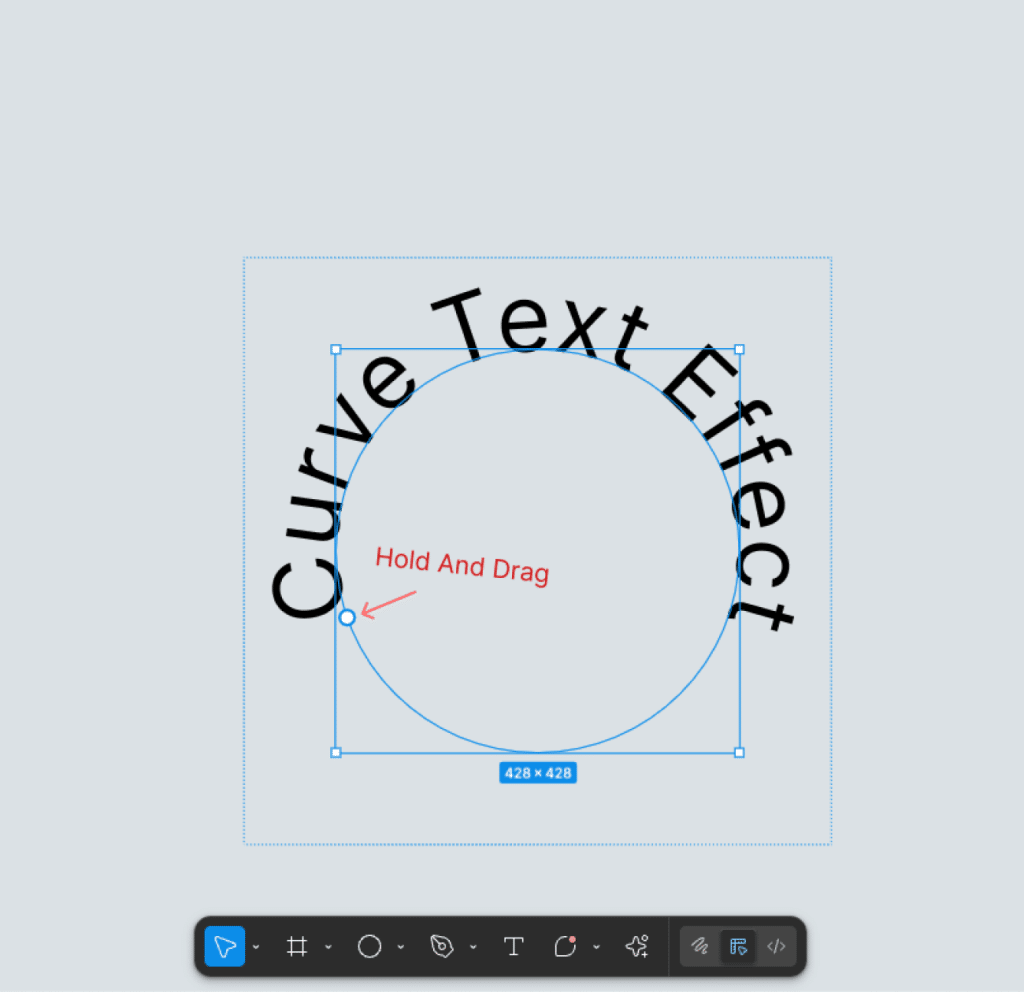
3. Apply the Curve:
- Select both the text and the path.
- Right-click and choose “Text on Path” or use the shortcut Shift + Command + P (Mac) or Shift + Ctrl + P (Windows).

4. Adjust the Position:
- Move the text along the curve by dragging it.
- Fine-tune the letter spacing and line height for a polished look.
💡 Pro Tip:
If you’ll be doing curved text often, install the Arc plugin — it’s the simplest and keeps your text editable (unlike outlining).
Method 2: Using the Arc Plugin
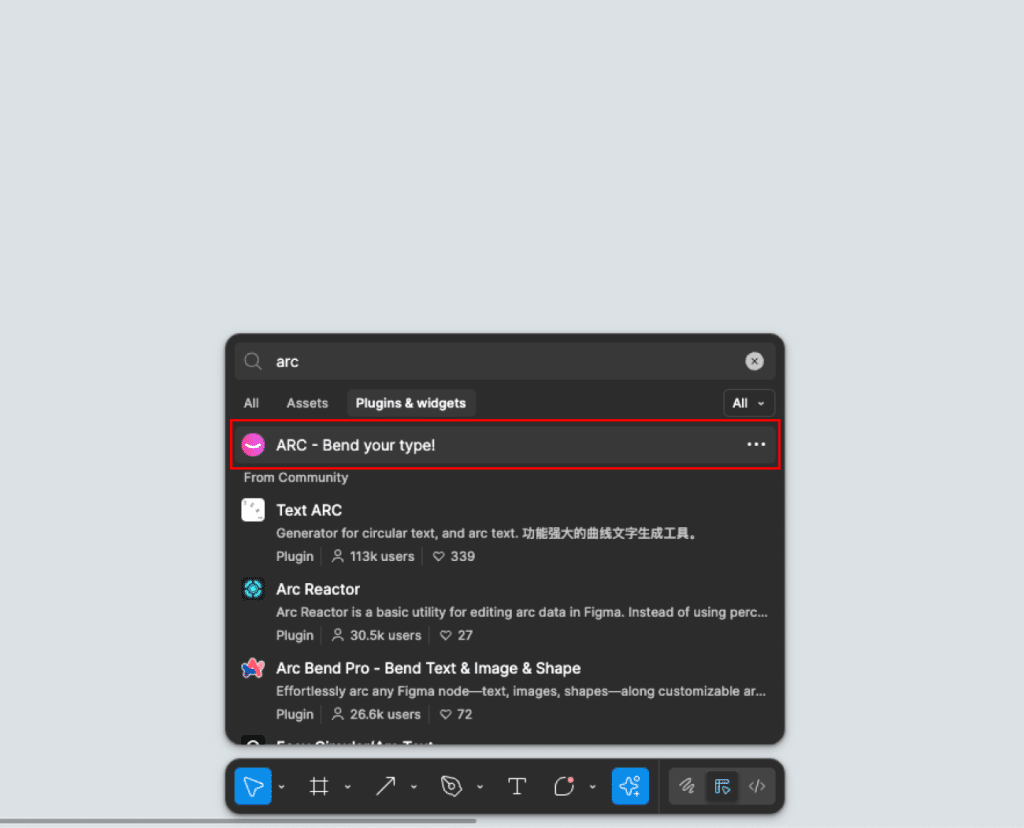
1. Install the Arc Plugin:
- Go to Plugins > Browse Plugins and search for “Arc”. Install the plugin.
2. Create Your Text:
- Use the Text Tool (T) to type the text.
3. Activate the Arc Plugin:
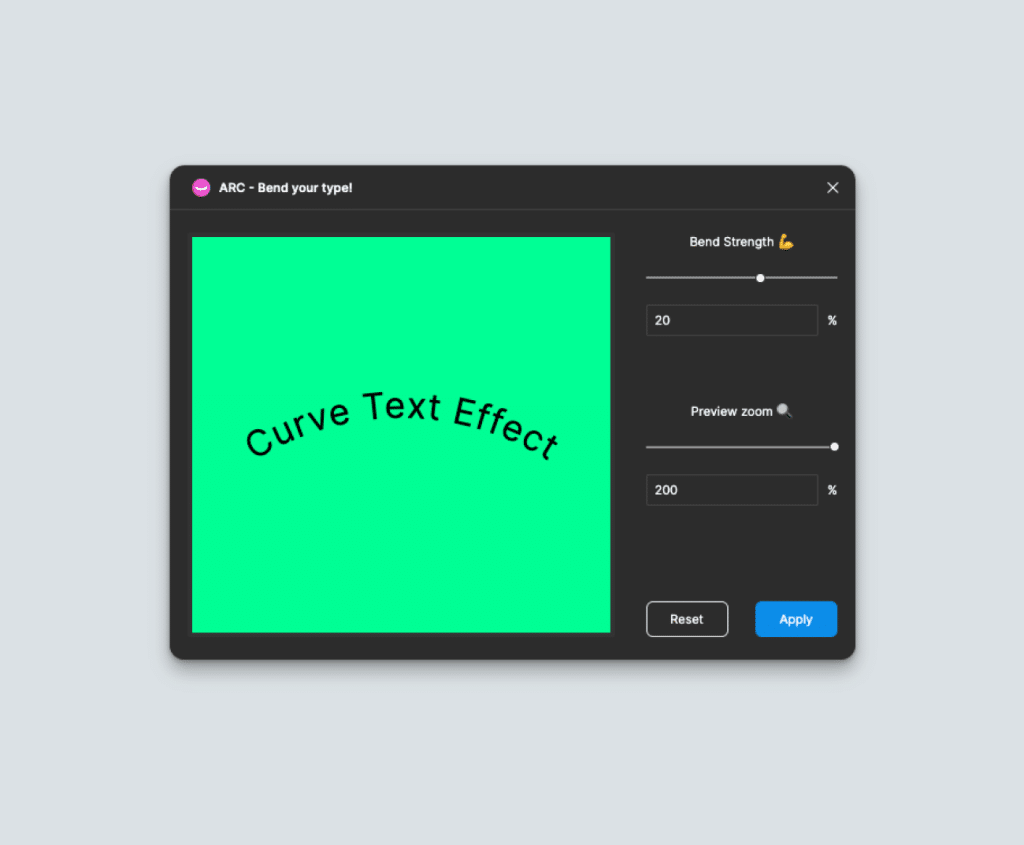
- Go to Plugins > Arc to open the plugin.
4. Apply the Curve:
- Select the text and adjust the radius, angle, and direction of the curve using the plugin’s controls.
5. Fine-tune the Text:
- After applying the curve, adjust the positioning and letter spacing to get the perfect curve effect.
Check out the best Figma UI Kit for enhanced workflow.
Check out the best Figma UI Kit – Sneat

Some Useful Plugins for Curving Text in Figma
- Arc Plugin
- Arc Plugin is simple to use and allows you to apply curves to text quickly, with adjustable radius and angle options.
- Ideal for creating circular or semi-circular text for logos, badges, and other designs.
- Text Path Plugin
- Text Path Plugin allows you to create custom paths and align text along them. It’s perfect for curving text along complex or irregular shapes.
- Curved Text Plugin
- Curved Text Plugin automatically adjusts the text to fit curves and provides additional customization, like letter spacing, making it easy to fit text along custom paths.
Conclusion:
Curving text is a fantastic way to add style and creativity to your design projects. Whether you choose the built-in Text on Path feature for simple curves or use a plugin for more flexibility, both methods offer effective ways to create curved text in Figma. Plugins like Arc and Text Path provide additional control, making them great choices for more complex designs.
Experiment with these methods and plugins to enhance your designs, making your text more engaging and eye-catching. Whether for logos, headers, or decorative elements, curved text can help elevate your project to the next level!