Are you looking to automate your streamline your communication using Discord server using automation? Don’t worry we’ve got you covered!
We all know how Discord has shaped modern communication with its unique features and easy-to-use interface. In this blog, we’ll be covering how we built automation on Discord by automating our product updates and a guide on setting up Role based notifications for our targeted audience.
So let’s get started!
Table of contents
Why Discord?
Before we just proceed we wanted to tell you what are the main reasons that we opted for Discord instead of any other communication platform.
Discord has become an important tool for having seamless communication and support for our clients.
With its real-time chat capabilities, it allows us to provide immediate assistance, discuss product updates, and address any issues promptly. By integrating ticketing software and support channels, we ensure that all client inquiries are handled efficiently, making it easier to stay connected and engaged.
Here are some of the major reasons why we opted for Discord:
- Real-Time Communication: Discord allows us to communicate with clients/customers instantly, which is especially useful in the fast-paced world of SAAS. Users can get their questions answered in real time, making the entire support experience quicker and more efficient.
- Community Engagement: Discord also supports a sense of community, allowing us to interact with our customers, share product news, and gather feedback in a collaborative environment. It’s not just about solving problems but building a relationship with our users.
- To Provide Support Facilities to Our Clients: Whether we’re addressing customer queries, troubleshooting issues, or offering assistance with our products, Discord allows us to provide direct and timely support to our users through various dedicated channels. This ensures that our clients receive personalized and immediate help whenever they need it.
Automating Product Updates & Communication
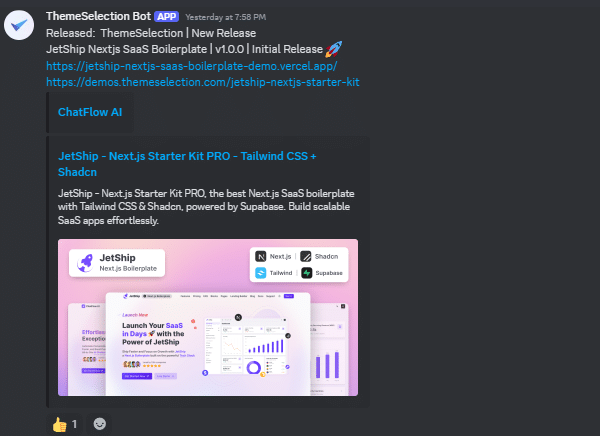
To ensure our users receive timely product updates, we have automated the process using Discord Webhooks, Make & Zapier.
These tools seamlessly integrate with our internal release system or RSS feed, enabling us to push announcements directly to our #release-steam channel. This ensures that every user stays informed about the latest features, improvements, and important news without any manual intervention.
We provide regular updates for three key products—Flyonui, SaaS Boilerplate, and ThemeSelection’s Admin Templates & UI Kits – Keeping our community up to date with the latest advancements and enhancements across each product.
Step-by-Step Guide to Setting Up Discord Automation with Make
1 . Sign Up on Make.com
- Go to Make.com and create an account if you don’t have one.
2 . Create a New Scenario
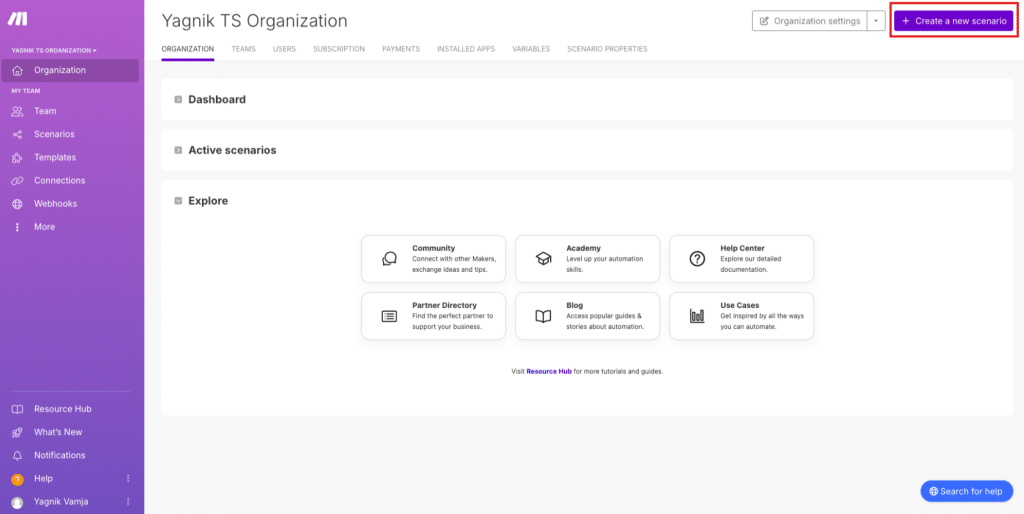
- Click ‘Create a new scenario.’
- You will see a blank canvas where you can build your automation.
3 . Add Slack as a Trigger
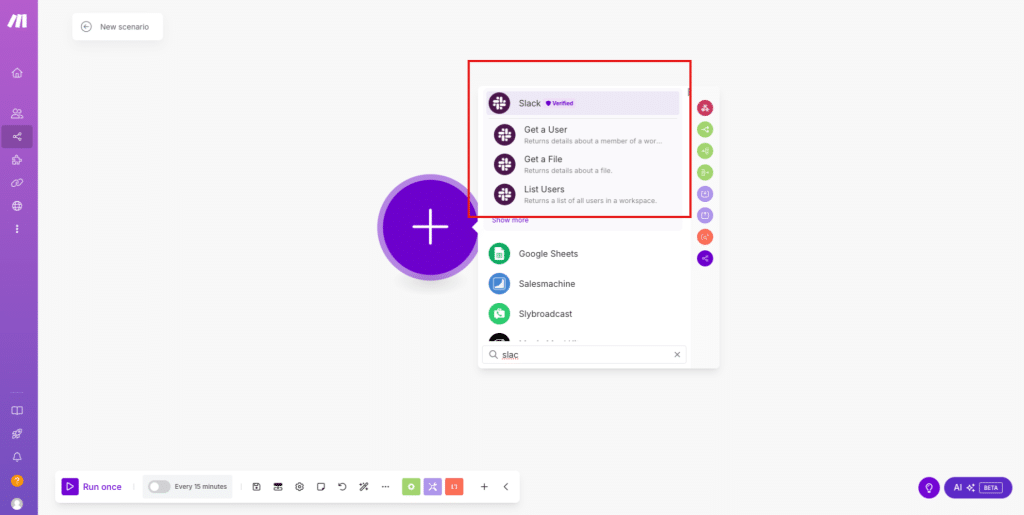
- Click the ‘+’ button and choose your respective communication platform.
- Select your channel to track a specific channel or messages.
- Connect your account and pick the channel you want to monitor.
4 . Add a Router Module
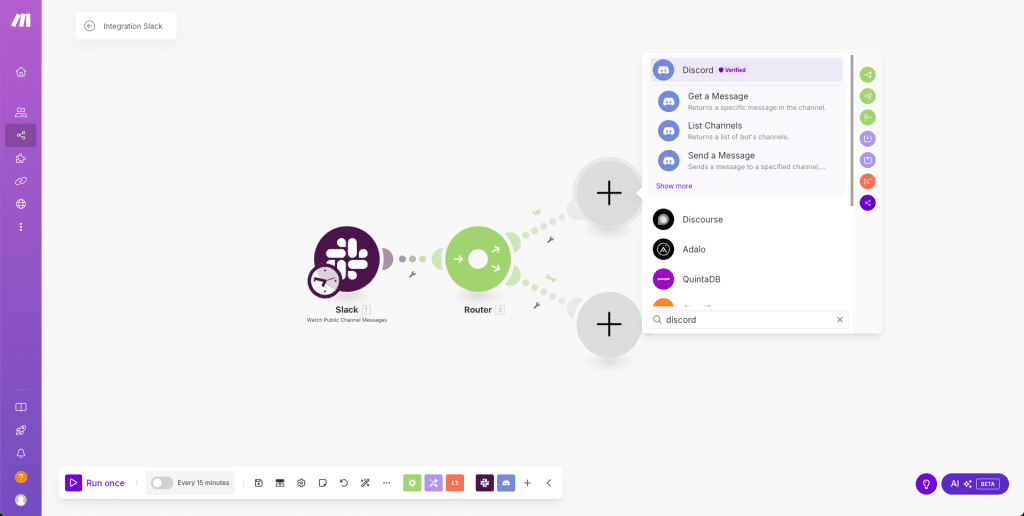
- Insert a Router after the previous module.
- This allows sending messages to different Discord channels based on conditions.
5 . Add Discord Modules

- Add a Discord – Send a Message module for each channel.
- Connect your Discord bot and grant the required permissions.
- Choose the correct Discord channel for each module.
- Set up the message content using the communication app’s data.
6 . Set Up Routing Rules
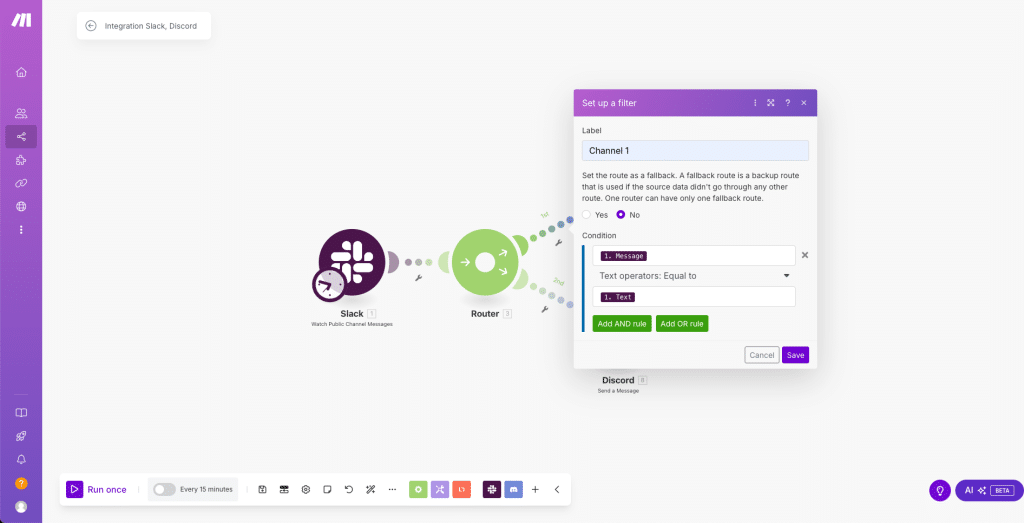
- Click the connection lines between the Router and Discord modules.
- Define conditions, like forwarding messages based on keywords or other filters.
7 . Test the Automation
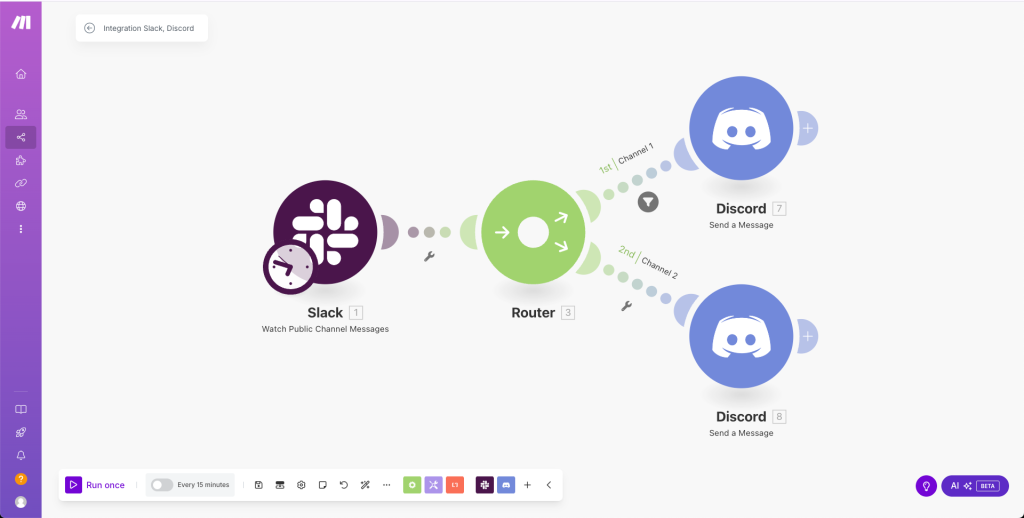
- Click Run Once to test.
- Send a message in your platform and check if it appears in the correct Discord channels.
8 . Activate the Automation
- If everything works, click Turn On to make it live.
- Now, your messages will be forwarded to Discord automatically.
Role-based Notifications for Targeted Updates
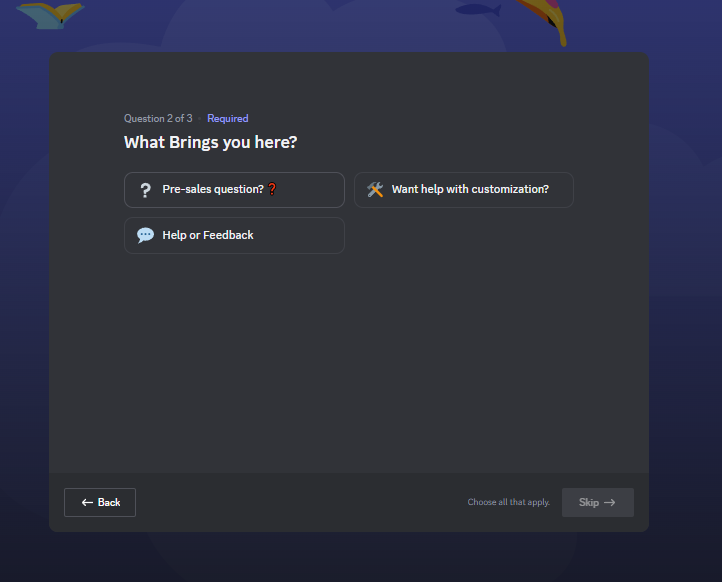
To ensure that our users receive only the updates relevant to them, we have implemented a role-based notification system. By utilizing bots like CARL-BOT or DYNO, users can opt-in for specific updates using reaction roles through the Discord On-Boarding automation feature. This allows them to receive targeted notifications about new features, bug fixes, or other important announcements according to their respective role, which they’ve chosen before. Which helps in reducing unnecessary alerts and improves engagement.
Step-by-Step Guide to Setting Up Role-Based Onboarding in Discord
- Enable Community Features
- Go to your Discord server settings and navigate to the “Community” tab.
- Enable “Community” settings to unlock onboarding and role assignment features.
- Set Up the Onboarding Feature
- In the “Community” settings, locate “Onboarding.”
- Click “Get Started” and select the default channels new users should see upon joining.
- Create Roles for Different Updates
- Navigate to “Server Settings” > “Roles.”
- Create separate roles for each type of update or announcement (e.g., Product Updates, Bug Fixes, Feature Releases).
- Configure Onboarding Questions for Role Assignment
- In the “Onboarding” settings, set up a series of questions to determine user interests.
- Assign roles automatically based on their responses.
- Ensure users can choose multiple options if needed.
- Test and Optimize the Onboarding Process
- Conduct test runs with new users to ensure roles are assigned correctly.
- Gather feedback and make necessary adjustments to improve user experience.
1. Choosing the Right Product for Your Needs

2. Choose Your Path: Let Us Guide You.
Creating Support forum
We manage customer support manually through our #help-forum channel, where users can post their queries, and our team responds directly within the thread. This approach ensures a personalized and interactive support experience while keeping discussions organized and accessible for future reference.
How Our Support Forum Works
- User Submission – A user enters the #help-forum channel and submits a new post.
- Team Response – Our team promptly picks up the post and replies privately within the thread.
- Product Identification – We check the user’s self-role to determine which product they need help with.
- Efficient Support – This minimizes back-and-forth questions, ensuring faster and more accurate responses.
- Personalized Experience – Users feel more connected as they receive tailored assistance.
- Issue Tracking – Every post is logged, allowing us to track past issues and prevent repetition.

Final Thoughts
Setting up our Discord server automation with structured channels, and a role-based onboarding system has completely transformed the way we handle communication and support. No more scattered messages missed queries, or unnecessary back-and-forth—everything now runs like a well-oiled machine.
From automating product updates to assigning roles based on user preferences, every step has been designed to make things smoother for both our team and the community. The introduction of role-based notifications ensures that users only receive updates relevant to them, keeping engagement high without overwhelming them with unnecessary alerts.
On top of that, our ticketing system in #help-forum allows us to offer personalized assistance without the hassle of cluttered public conversations. By checking self-assigned roles, we can instantly identify the user’s needs and provide accurate help in no time.
By leveraging the right mix of Make, Webhooks, and Discord’s onboarding features, we’ve built a seamless experience that fosters engagement, reduces response times, and enhances customer satisfaction. If you’re planning to set up a similar system, don’t just rely on manual processes—automation is the key to scaling efficiently while keeping your users happy.
Want to see our setup in action? Join our Discord community Themeselection’s Community