This guide will help you understand not only how the Laravel Vite setup works but also how to migrate from Laravel Mix to Laravel Vite.
In recent years, frontend tooling has shifted dramatically toward faster, more modern build systems. Vite is one of the most exciting tools driving that shift.
In simple terms, Vite is a next-generation frontend build tool that significantly improves the development experience by leveraging native ES modules and a lightning-fast development server. Instead of bundling your entire application up front, Vite serves source files directly and bundles them only for production. This approach makes development faster, feedback loops shorter, and builds more optimized.
Laravel adopted Vite as its default frontend build tool starting from Laravel 9. If you’re used to Laravel Mix (Webpack), this change may feel unfamiliar at first, but the payoff is real: faster builds, simpler configuration, and a more enjoyable frontend workflow.
Table of Contents
What Is Vite?
Vite is a modern frontend build tool created by Evan You (the creator of Vue.js). It solves two big challenges:
- Slow Build Times: Traditional bundlers (like Webpack) compile and bundle all of your code before serving it. As projects grow, build times increase, which slows down development feedback loops.
- Slow Hot Module Replacement (HMR): When you change your code, you want to see updates in the browser instantly. Older tools can feel sluggish because they rebuild large parts of the application on every change.
How Vite Solves This?
Instead of bundling everything upfront:
- Vite serves source code directly using native ES modules in development
- Only the code you change is reloaded (HMR)
- For production, it bundles using Rollup for efficient output
The result?
- Near-instant development startup
- Highly responsive updates during coding
- Faster builds compared to older tools
Why Vite (Compared to Laravel Mix)?
Laravel Mix was built on top of Webpack and served the community well for many years. But modern frontend development demands faster feedback loops and simpler configuration.
Here’s a practical comparison:
| Feature | Laravel Mix (Webpack) | Vite |
|---|---|---|
| Dev Server Startup | Slower | Instant |
| HMR | Rebuild-based | Module-level updates |
| Dev Bundling | Bundle everything first | Serves files on demand |
| Config Complexity | Moderate to heavy | Minimal |
| Module System | CommonJS + ES Modules | Native ES Modules |
| Env Variables | process.env.MIX_* | import.meta.env.VITE_* |
| Production Bundler | Webpack | Rollup |
| ES Module Support | Limited | Native |
In real-world development, this means:
- Vite feels significantly faster.
- Browser updates happen almost instantly.
- Configuration is cleaner and easier to maintain.
- It aligns better with modern frontend tooling.
How Vite Works in Laravel?
Laravel integrates Vite via the official laravel-vite-plugin plugin. It automatically manages:
This plugin handles:
- Development server integration
- Asset versioning
- Blade directive for loading assets
- Production build output
You don’t need to manage hashed filenames or asset versions manually anymore. Laravel handles it automatically.
How To Set Up A Project in Laravel Vite?
If you’re starting a new Laravel 9+ project, Vite is already included.
Create a Laravel Project:
First, create a new Laravel project using Composer:
composer create-project laravel/laravel vite-demo
cd vite-demo
npm install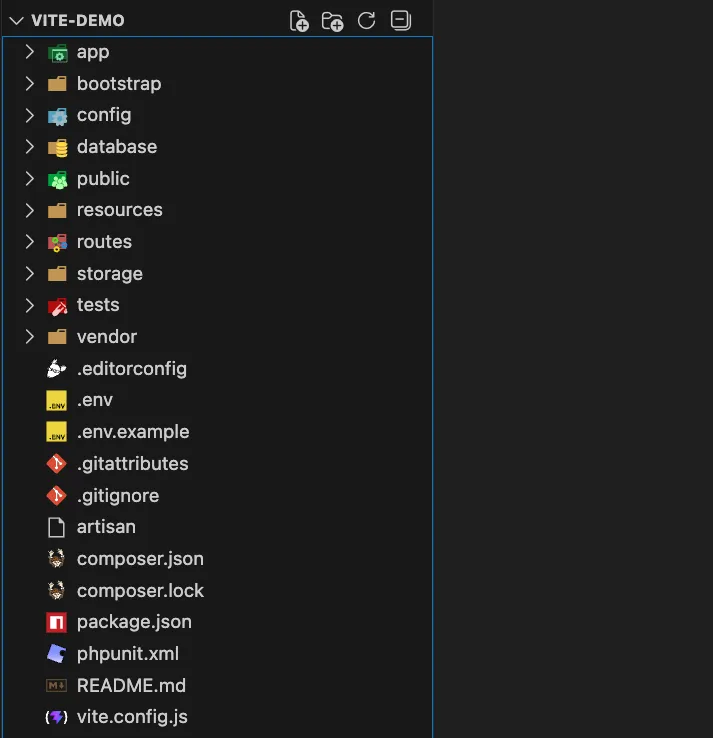
Let’s understand what each command does:
composer create-project laravel/laravel vite-demoThis command downloads and installs a fresh Laravel application inside a folder named vite-demo.cd vite-demoThis moves you into the newly created Laravel project directory.npm installLaravel uses Node.js to manage frontend dependencies. Running this command installs all required frontend packages listed in the project’s package.json file, including Vite and its related dependencies.
Once this step is completed, your Laravel project is ready to use Vite for asset compilation.
Start the Development Server
Next, run the following commands:
npm run dev
php artisan serve
Here’s what these commands do:
npm run devThis command starts the Vite development server. The dev server compiles your JavaScript and CSS files and serves them instantly during development. It also enables Hot Module Replacement (HMR), meaning changes appear in the browser immediately without refreshing the page.php artisan serveThis command starts Laravel’s built-in PHP development server so you can access your application in the browser.
Now open your browser and visit: http://127.0.0.1:8000
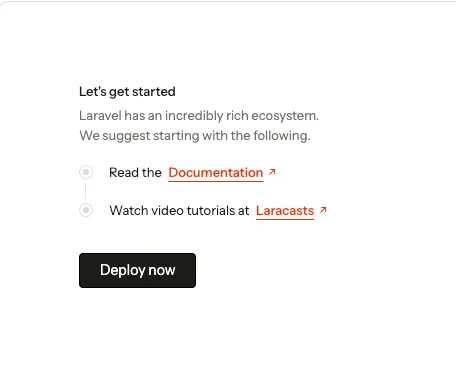
Your Laravel app is now running with Vite, serving your assets.
Understanding vite.config.js
Inside your Laravel project, you will find a file named: vite.config.js. This file contains the configuration that tells Vite how to process and serve your frontend assets.
Open the file, and you’ll see something similar to this:
import { defineConfig } from 'vite';
import laravel from 'laravel-vite-plugin';

export default defineConfig({
    plugins: [
        laravel({
            input: [
                'resources/css/app.css',
                'resources/js/app.js',
            ],
            refresh: true,
        }),
    ],
});
This file tells Vite:
- What files to process (
input) - To automatically refresh when Blade templates change (
refresh) - To use Laravel’s official plugin
This replaces the old webpack.mix.js.
Let’s break down what this configuration means.
defineConfig()
The defineConfig function is provided by Vite. It simply helps organize the configuration in a structured way and enables better type support.
laravel-vite-plugin
The laravel-vite-plugin connects Vite with Laravel. It handles several things automatically, including:
- Loading assets inside Blade templates
- Managing development vs production assets
- Automatically refreshing the browser when Blade files change
input
input: [
'resources/css/app.css',
'resources/js/app.js',
]
This option defines the entry points for your frontend assets.
In a typical Laravel project:
resources/css/app.css→ main CSS fileresources/js/app.js→ main JavaScript file
Vite starts from these files and processes everything imported inside them.
refresh: true
This enables automatic browser refresh whenever Laravel Blade templates or backend files change. This improves the development workflow because you don’t need to manually reload the page.
In older Laravel projects, similar behavior was configured inside webpack.mix.js. With Vite, the configuration is much simpler.
Including Assets in Blade with @vite
Laravel provides a Blade directive called @vite() to load your compiled assets.
In your Blade template (for example resources/views/welcome.blade.php), you’ll see something like this:
@vite(['resources/css/app.css', 'resources/js/app.js'])This directive:
- Loads the dev server assets in development
- Loads compiled hashed assets in production
This directive tells Laravel to include the compiled CSS and JavaScript files that are managed by Vite. What makes this powerful is that Laravel automatically detects the environment.
During Development
When running npm run dev, Laravel loads assets from the Vite development server. This enables features like:
- Hot Module Replacement
- Instant updates
- Faster development workflow
During Production
When you run npm run build, Vite generates optimized static files inside: public/build
Laravel then loads those compiled files automatically using the same @vite() directive. In older Laravel applications using Mix, you had to manually include assets like this:
<script src="{{ mix('js/app.js') }}"></script>With Vite, the Blade directive simplifies this process significantly.
Check out the best Vite-supported Laravel Template: Sneat

Migrating from Laravel Mix to Vite
If you’re upgrading an existing Laravel project that still uses Laravel Mix, migrating to Vite requires a few changes.
Remove Mix
- First remove Laravel Mix from the project:
npm remove laravel-mix- Then delete the configuration file used by Mix:
webpack.mix.js- Laravel Mix used this file to define how assets should be compiled using Webpack. Since Vite replaces Mix, this file is no longer required.
- Next, open the project’s package.json file and remove any scripts related to Mix, such as:
"development": "mix",
"watch": "mix watch"
Install Vite
- Now install Vite and Laravel’s official plugin:
npm install --save-dev vite laravel-vite-plugin- This installs:
- Vite – the frontend build tool
- laravel-vite-plugin – integration between Laravel and Vite
- After installing, update your package.json scripts to use Vite instead:
"scripts": {
  "dev": "vite",
  "build": "vite build"
}
These scripts allow you to run the Vite development server and build production assets.
Create vite.config.js
Now create the Vite configuration file: vite.config.js
Example configuration:
import { defineConfig } from 'vite';
import laravel from 'laravel-vite-plugin';
import tailwindcss from '@tailwindcss/vite';

export default defineConfig({
    plugins: [
        laravel({
            input: ['resources/css/app.css', 'resources/js/app.js'],
            refresh: true,
        }),
        tailwindcss(),
    ],
    server: {
        watch: {
            ignored: ['**/storage/framework/views/**'],
        },
    },
});
This configuration defines how Vite should process your project assets and integrate with Laravel. The Tailwind plugin shown above is optional and is only needed if your project uses Tailwind CSS.
Update Blade Templates
Finally, update how your Blade templates load assets.
- Previously with Mix:
mix('js/app.js')- Replace it with the Vite directive:
@vite(['resources/js/app.js'])This allows Laravel to automatically load the correct development or production assets.
Important Migration Changes You Must Not Miss
Here are the most important changes you must not forget:
Environment Variables Must Change:
- Old:
MIX_API_URL=http://localhost- New:
VITE_API_URL=http://localhost- Old JavaScript usage:
process.env.MIX_API_URL- New Vite usage:
import.meta.env.VITE_API_URLIf you forget this step, frontend variables won’t work.
You can read more in Vite’s official documentation on environment variables.
Replace require() with ES Modules
- Old:
const axios = require('axios');- New:
import axios from 'axios';Vite only supports ES modules.
Explicit CSS Imports
- Make sure CSS files are imported inside your JS entry file:
import '../css/app.css';Using Vue with Vite in Laravel
- If your Laravel app uses Vue, install the official plugin:
npm install @vitejs/plugin-vue --save-devThen update vite.config.js:
import vue from '@vitejs/plugin-vue'

export default defineConfig({
  plugins: [
    laravel({
      input: ['resources/js/app.js'],
      refresh: true,
    }),
    vue(),
  ],
});
Now .vue Files will work out of the box. You can learn more about Vue at the official site.
Talking about React, you can consider using the best Free React Template: Materio MUI Nextjs Dashboard

This is one of the best free vercel theme you can consider for your vercel projects.
Using React with Vite in Laravel
- For React support, install the React plugin:
npm install @vitejs/plugin-react --save-dev- Update
vite.config.js:
import react from '@vitejs/plugin-react';

export default defineConfig({
  plugins: [
    laravel({
      input: ['resources/js/app.jsx'],
      refresh: true,
    }),
    react(),
  ],
});
Now you can write modern React code with Vite. For further info, check React documentation.
Building for Production
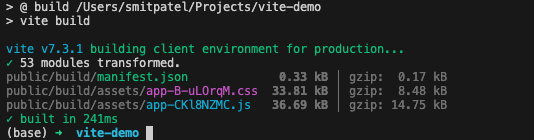
When you’re ready to deploy your application, you need to generate optimized production assets.
- Run the following command:
npm run buildThis command tells Vite to compile and bundle your frontend files for production.
- The compiled files are stored inside:
public/buildThese files are:
- Optimized
- Minified
- Versioned with unique hashes
Laravel automatically loads these files when the application runs in production. This ensures better performance, caching, and faster page loading.
Common Issues and Fixes
404 Errors for Assets
Make sure you ran:
npm run dev— for developmentnpm run build— for production
Assets won’t load if the build hasn’t been generated.
CSS Not Loading
Check that CSS is imported in your JS entry file:
import '../css/app.css';HMR Not Working
If you’re using a custom local domain (Valet), you may need to configure the server.host in vite.config.js.
Conclusion:
Laravel’s switch from Mix to Vite was more than a tooling update; it was a shift toward modern frontend standards.
Vite provides:
- Faster development builds
- Instant hot module replacement
- Cleaner configuration
- Better alignment with ES modules
- Strong support for Vue and React
If you’re starting a new Laravel project today, Vite is already included and ready to use.
If you’re maintaining an older Laravel project, migrating to Vite will significantly improve your development experience.
Once you experience Vite’s speed, it’s hard to go back.